Splitting Axe Sheath
I didn’t really like the plastic sheaths that came with my Fiskars axes. They were a little cumbersome to use, and definitely too bulky. So, I decided to make my own out of leather.
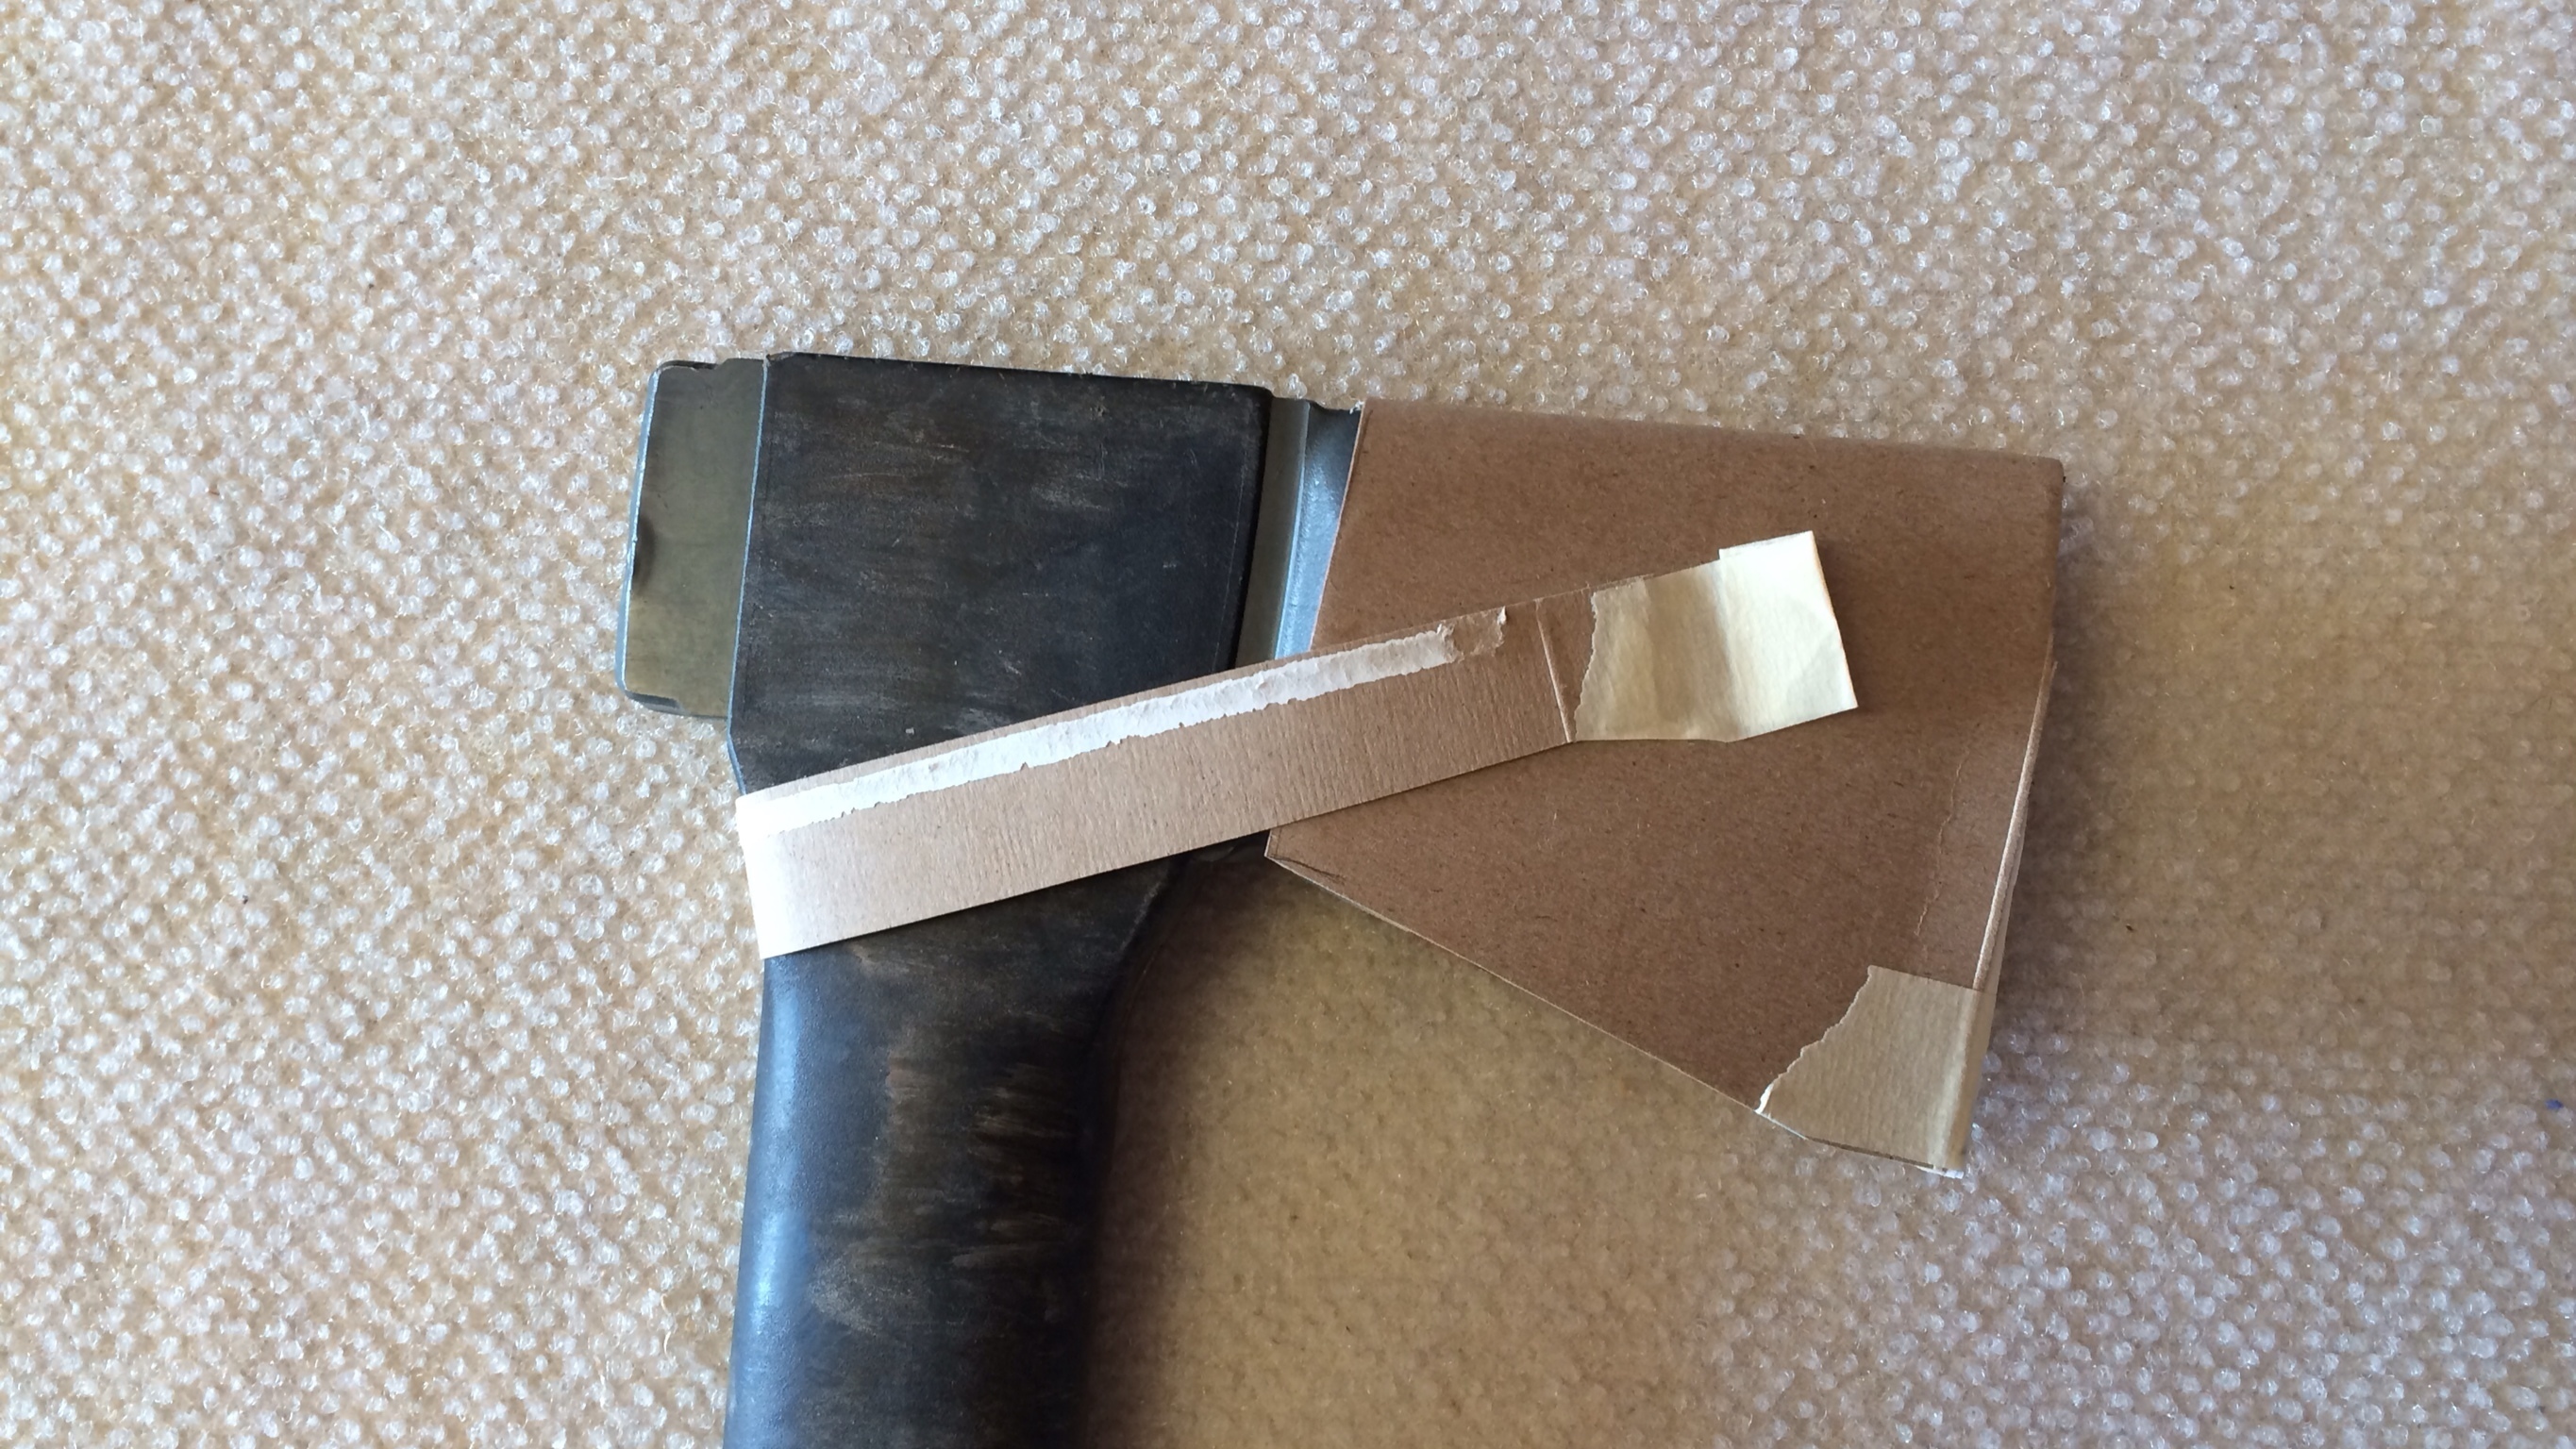
I started by making a template out of cardboard. I knew that I wanted the sheath to fold over the top of the blade, and have a seam at the sharp part. So I took a piece of cardboard, folded it over the top, and cut it to the shape I wanted.

I also put a small strip of leather up against the sharp part of the blade. This helps to ensure that the blade will not cut through the stitching, and it makes the fold at the top corner less drastic.
With the cardboard template on, I also experimented with the size and position of the strap.
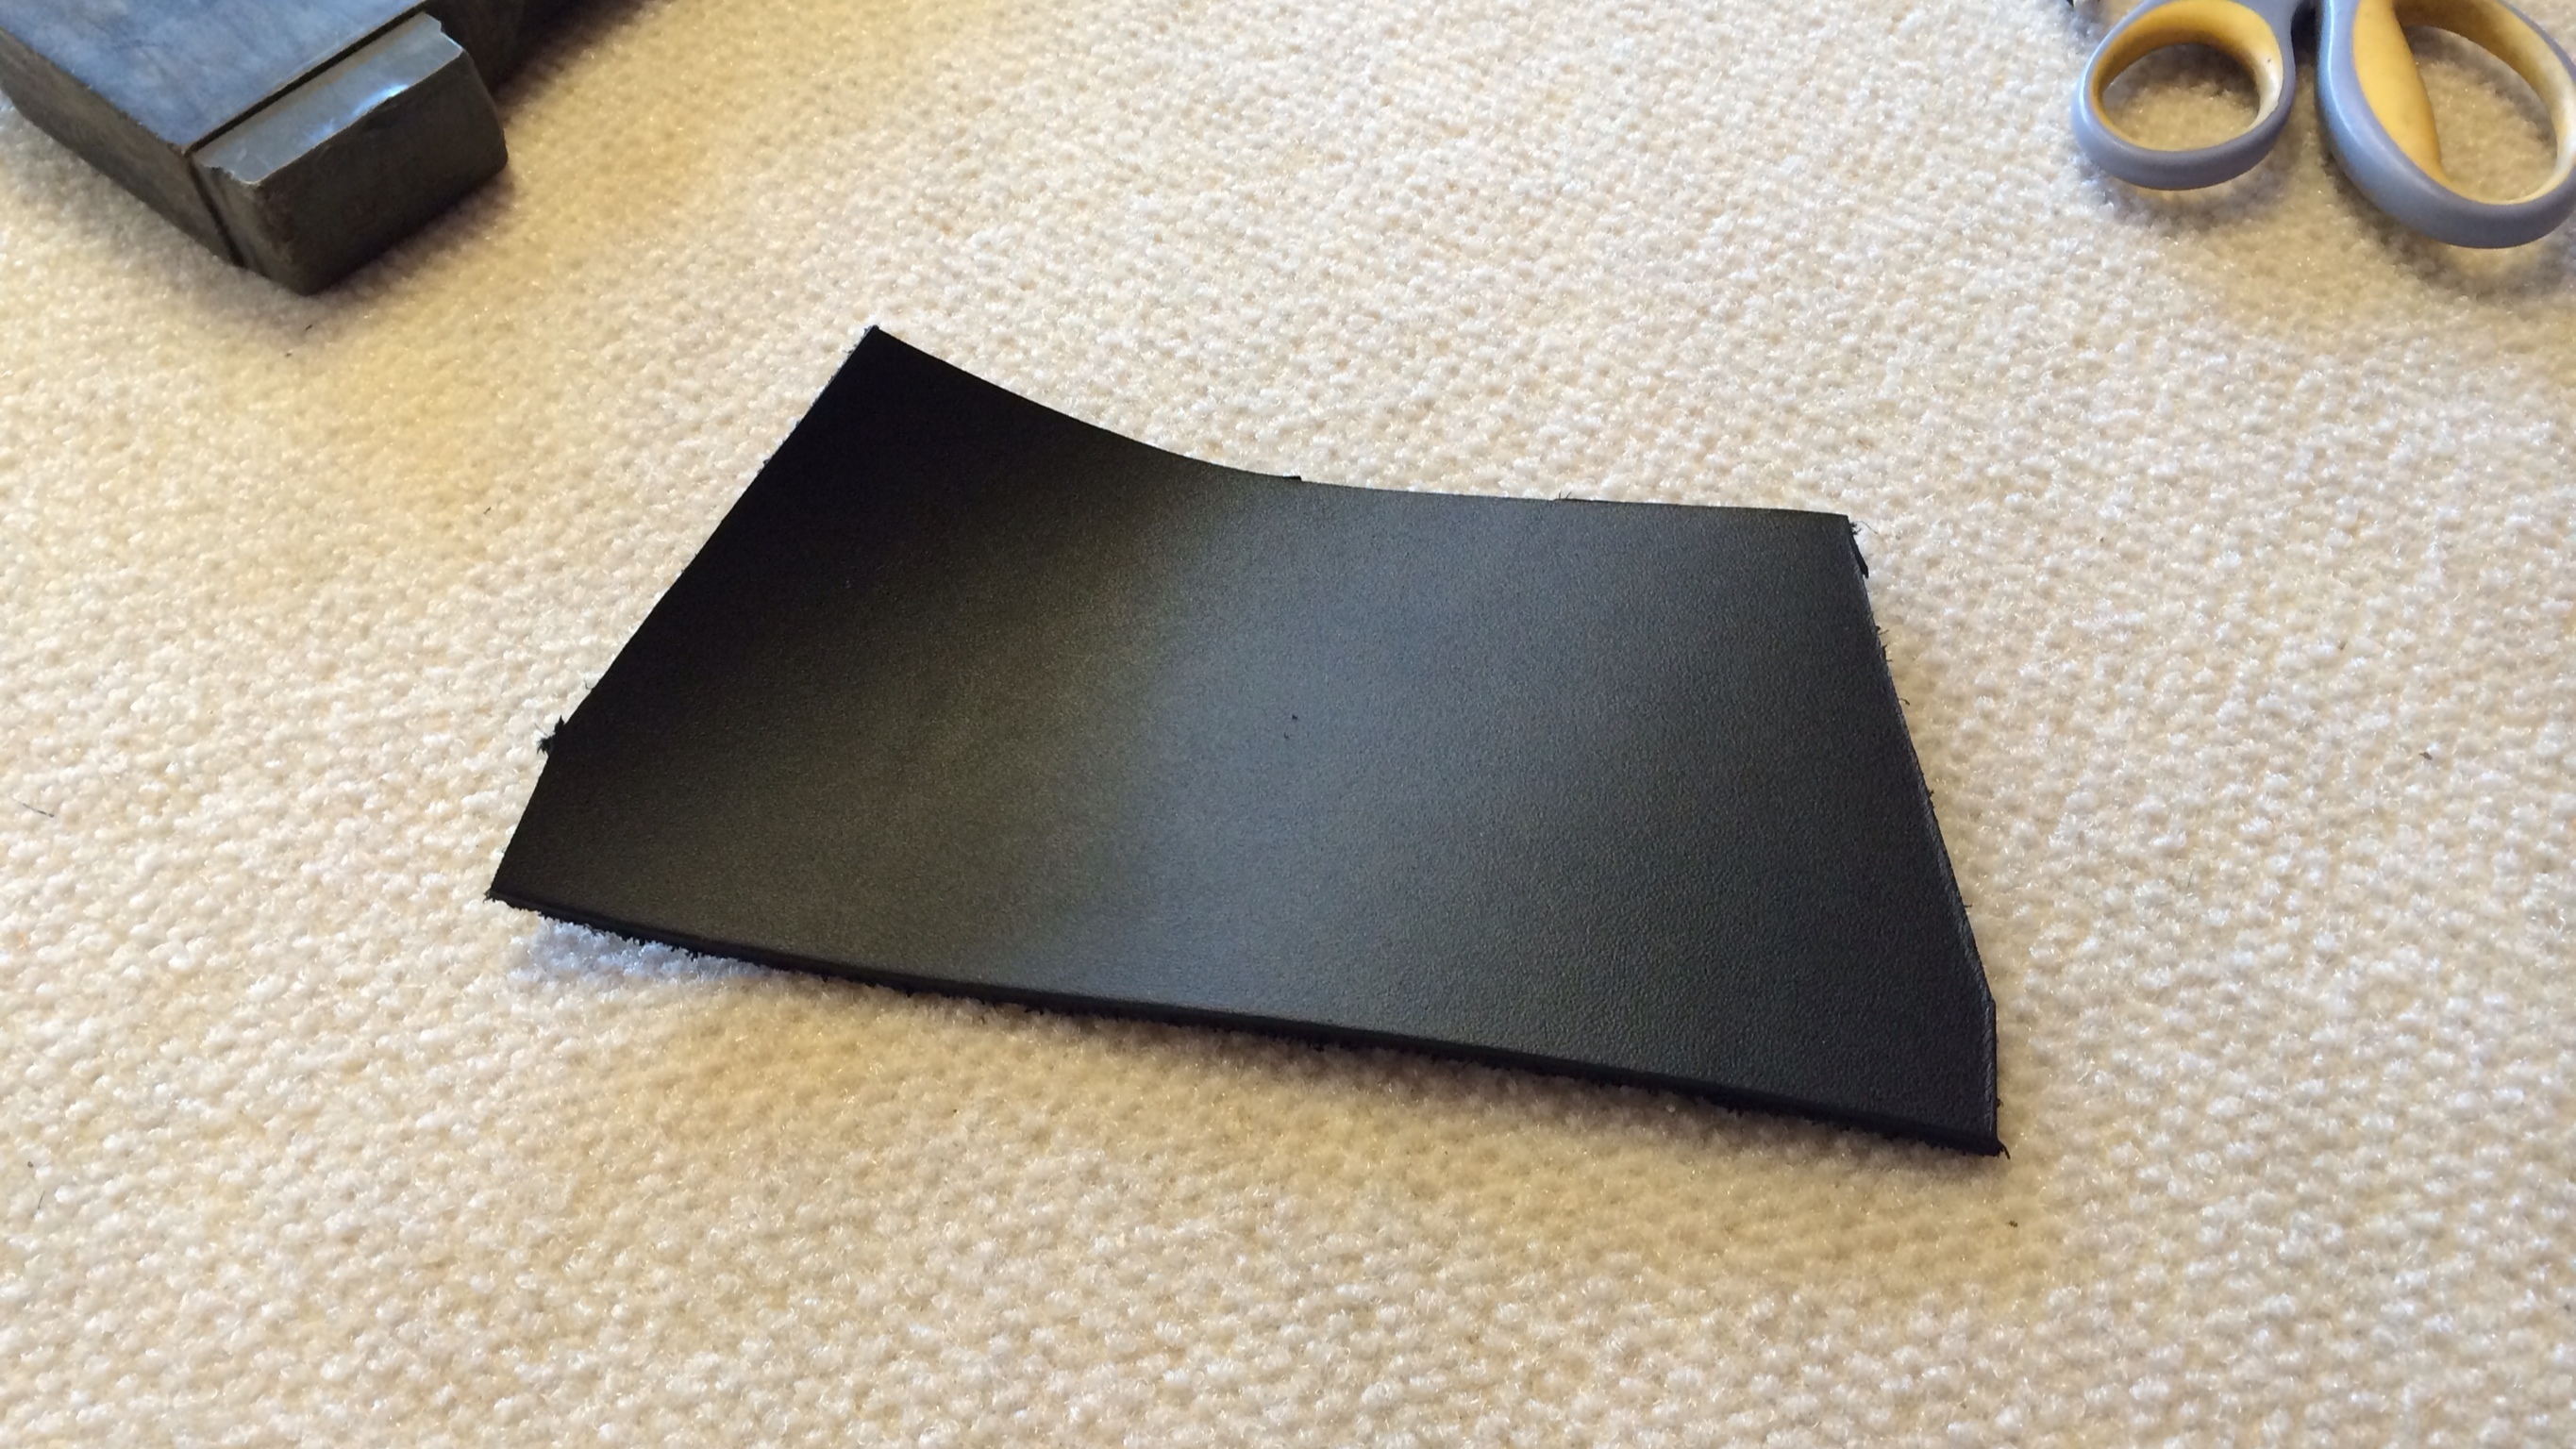
When I was satisfied with the shape and fit of the cardboard template, I removed it, flattened it out, and placed in on a piece of leather. I held it in place while I cut the leather to the same shape and size.
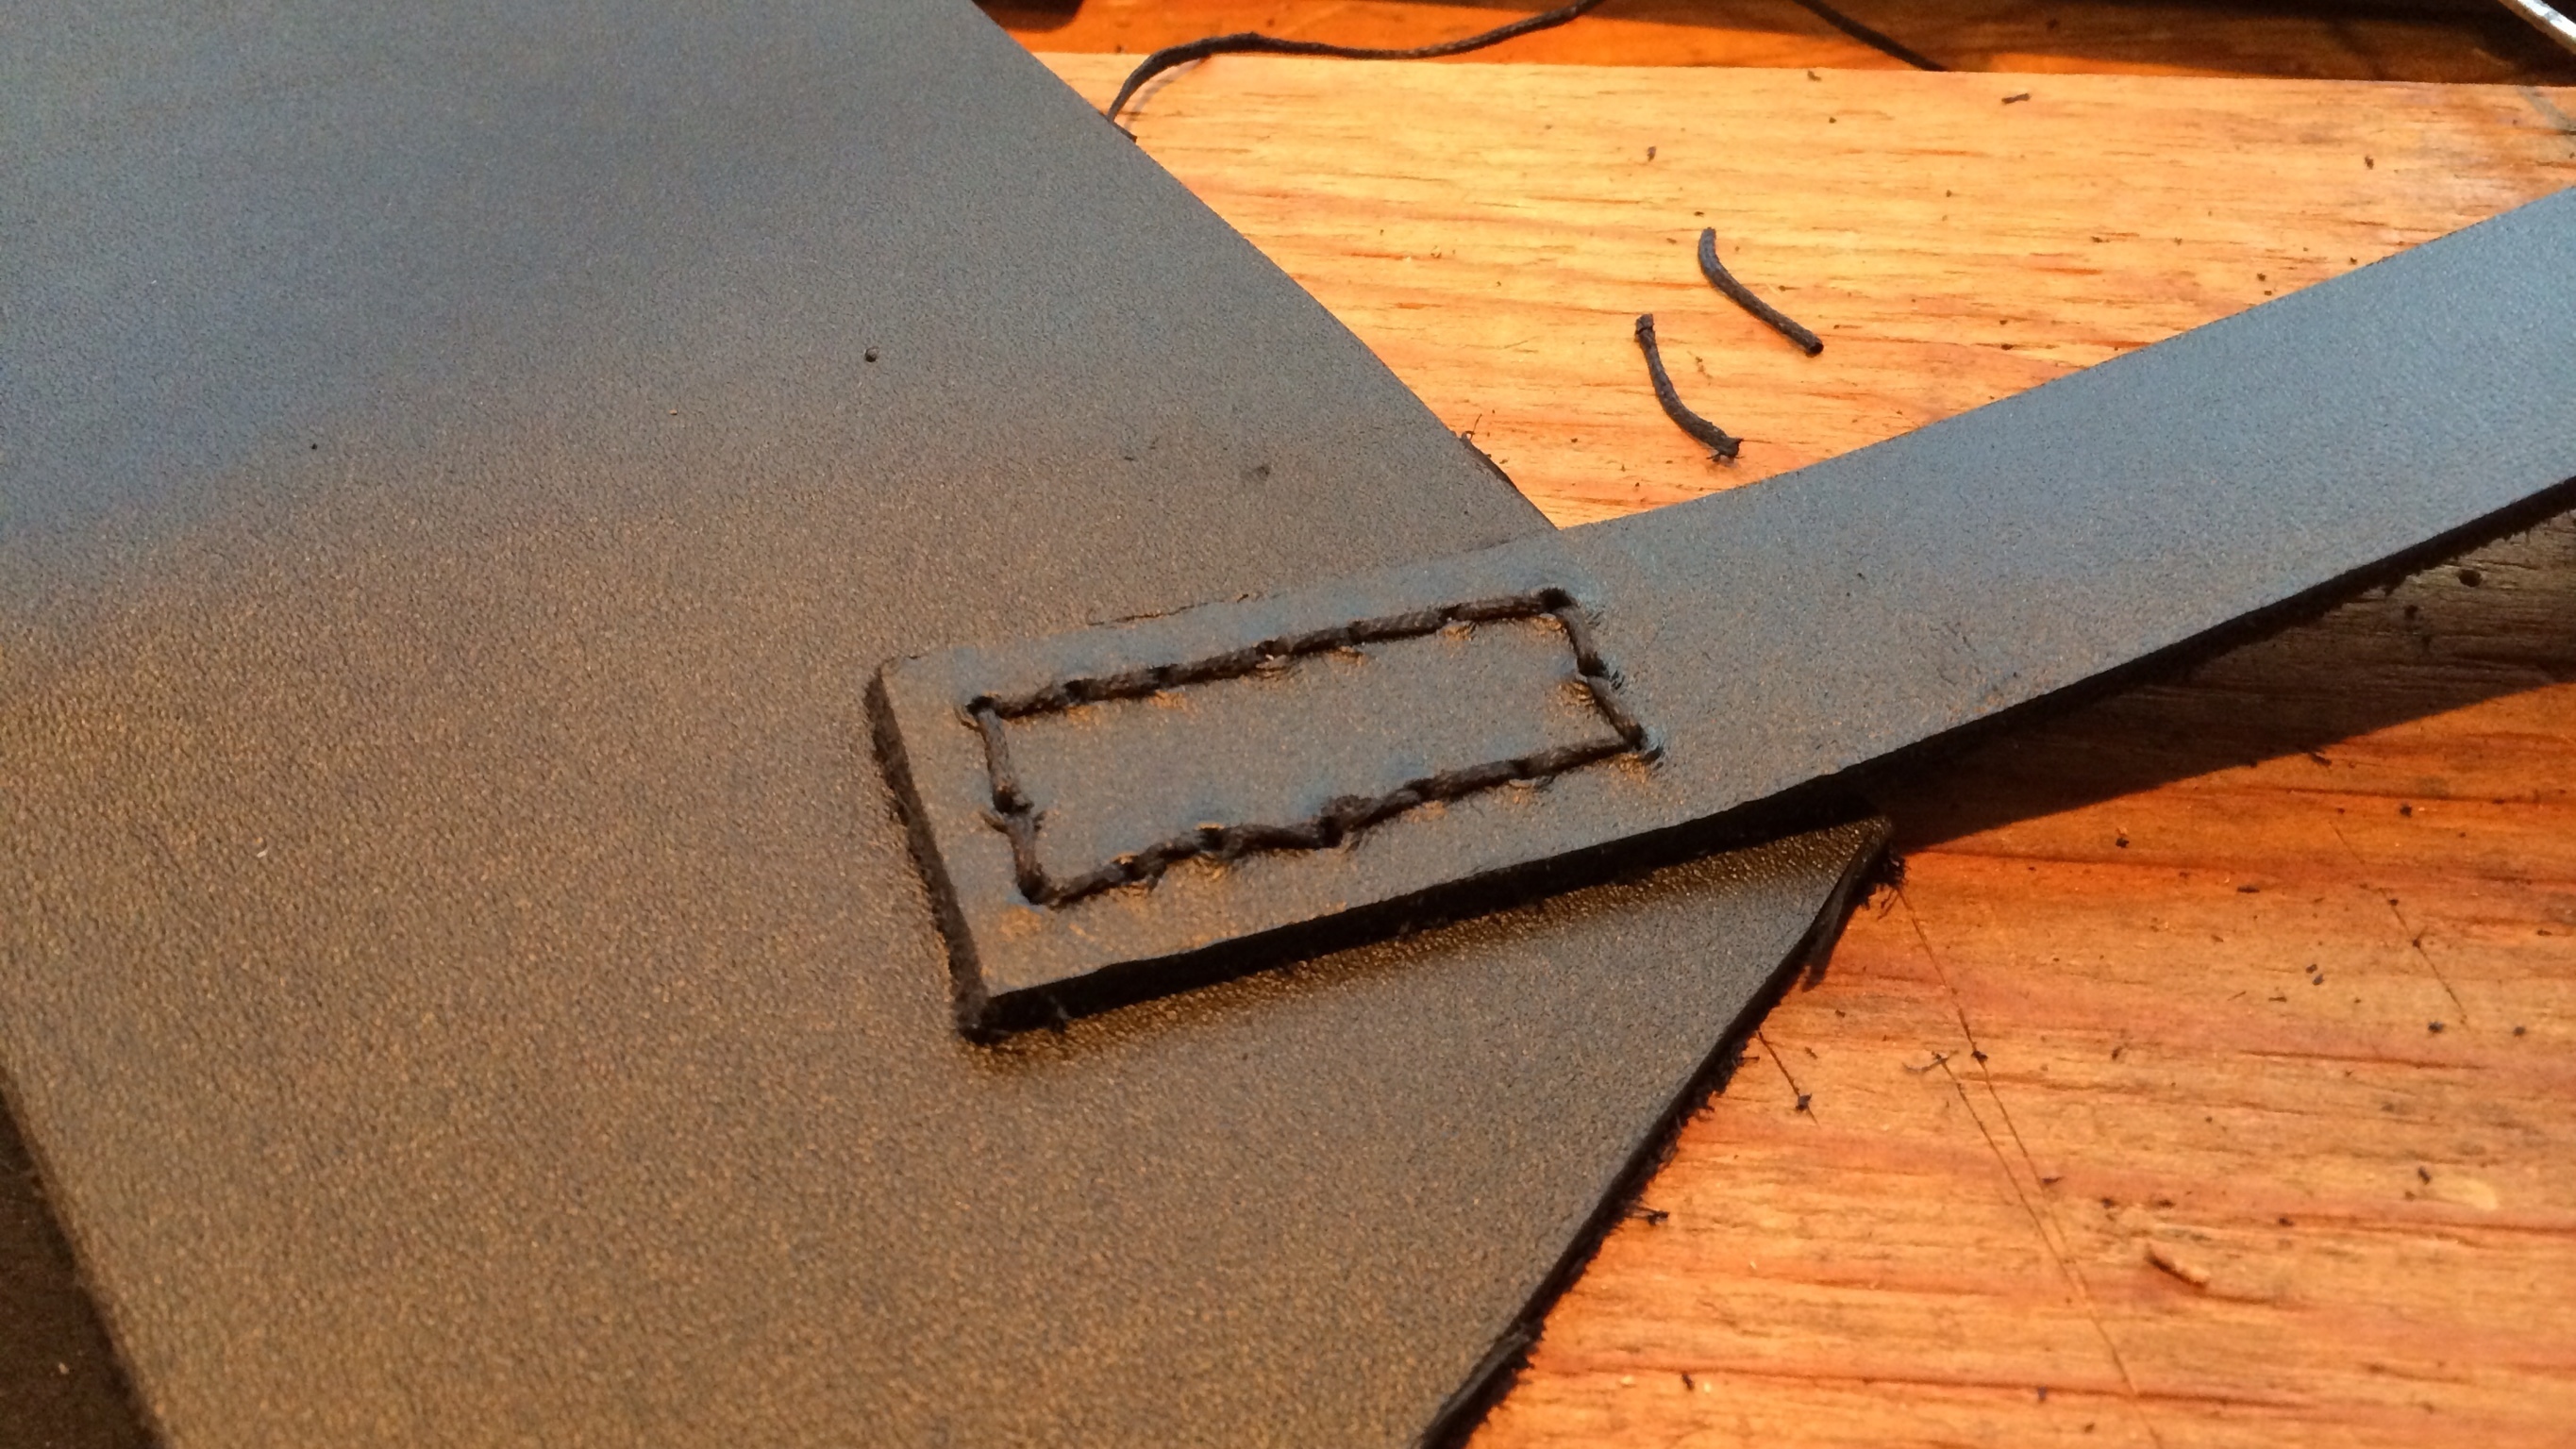
I cut out a strap based on the length of the cardboard strap I had made earlier. This strap needed to be long enough to loop around the handle, and have space beyond the snap to make it easy to grab.
Then I cut out the spacer from a scrap. The L shape of this piece helps to prevent the blade from slipping out.
![]()
I folded the sheath body over the top of the blade, and clamped it along the edge that would later be sewn, with the spacer in place.
I arranged the strap in a way that would hold the sheath firmly, and taped the back end in place with some masking tape. I removed the clamps holding the sheath together, and flattened it to make it easier to sew.

Next I drilled holes for the stitching to hold the strap with a 1/16’’ drill bit. At first, I tried to drive the thread through with a leather awl, but found the leather too heavy for that. Eventually I bought some stitching needles to thread the string through the pre-drilled holes.
I sewed the strap with a stitch that works like a sewing machine, so a loop of the thread is just pushed through a hole, and a thread on the other side goes through it. This worked okay, but I used a different stitch later. I finished the stitching with square knots on the inside of the sheath—nothing fancy.
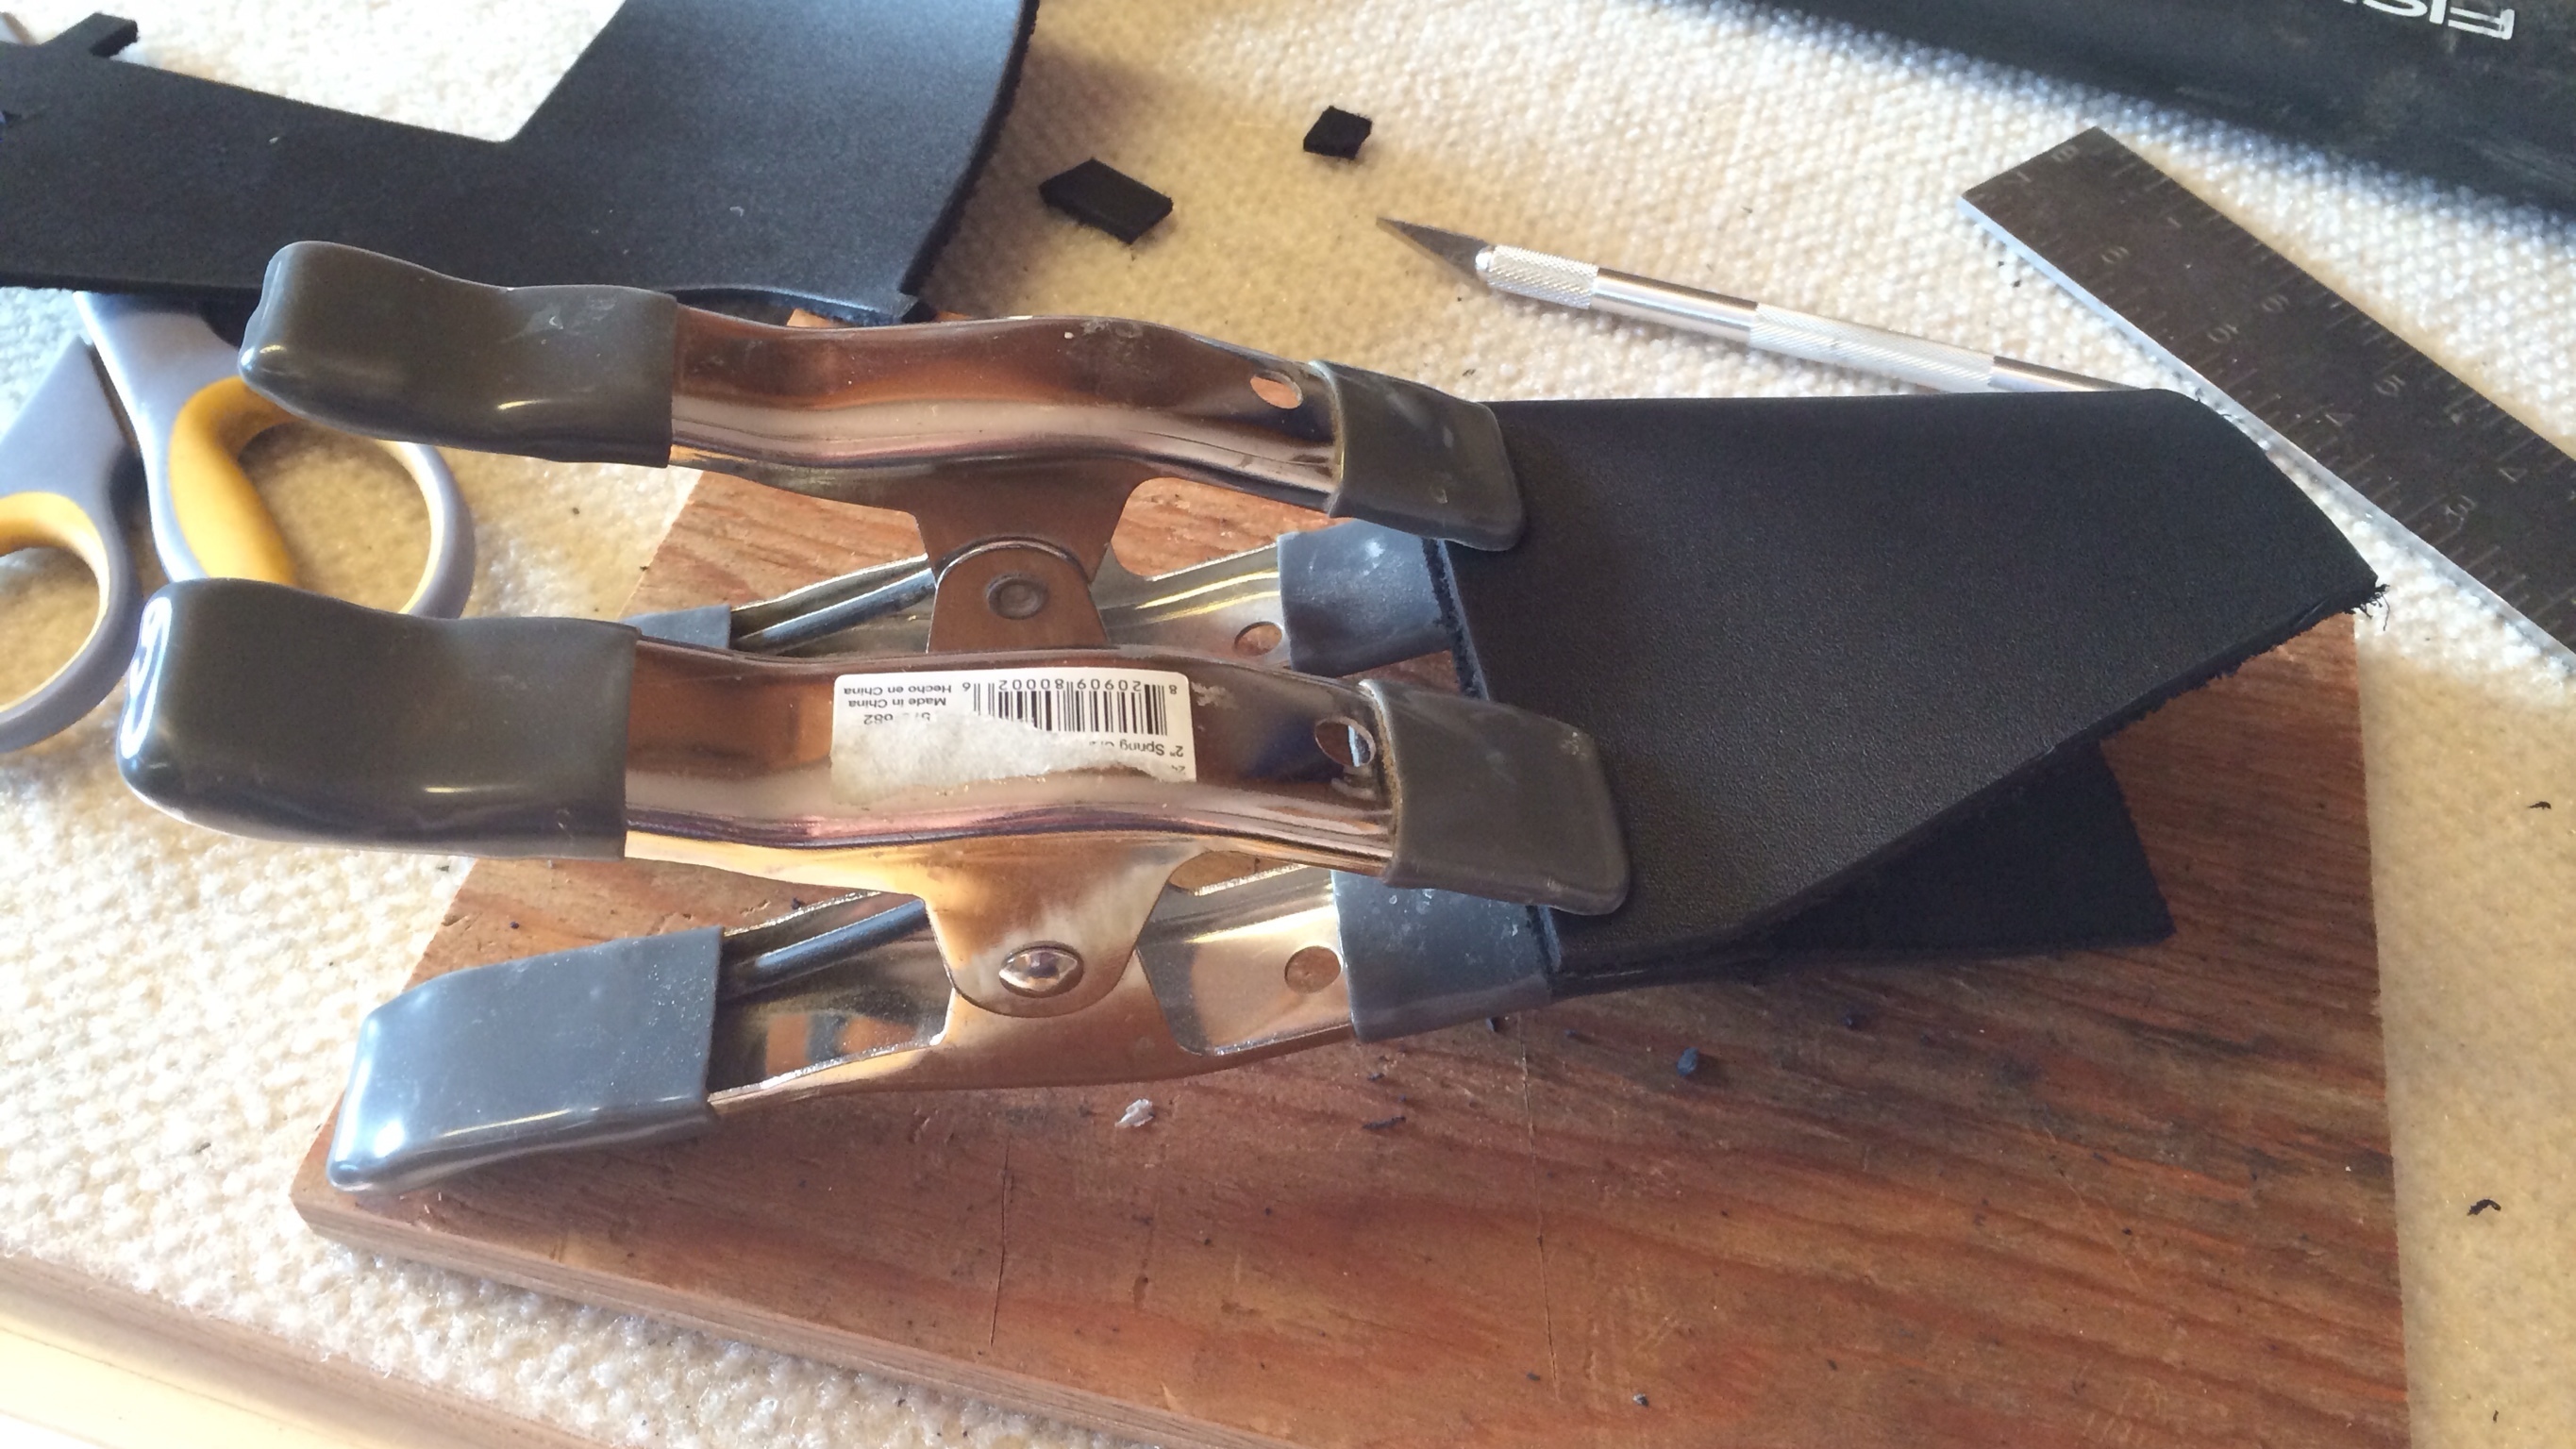
I then clamped the sheath back on the axe, and positioned the strap for the snap. The male end of the snap goes on the sheath itself, with the female part on the strap. I put a piece of masking tape on the sheath, on each side of the strap. I punched a hole between them using a leather punch.
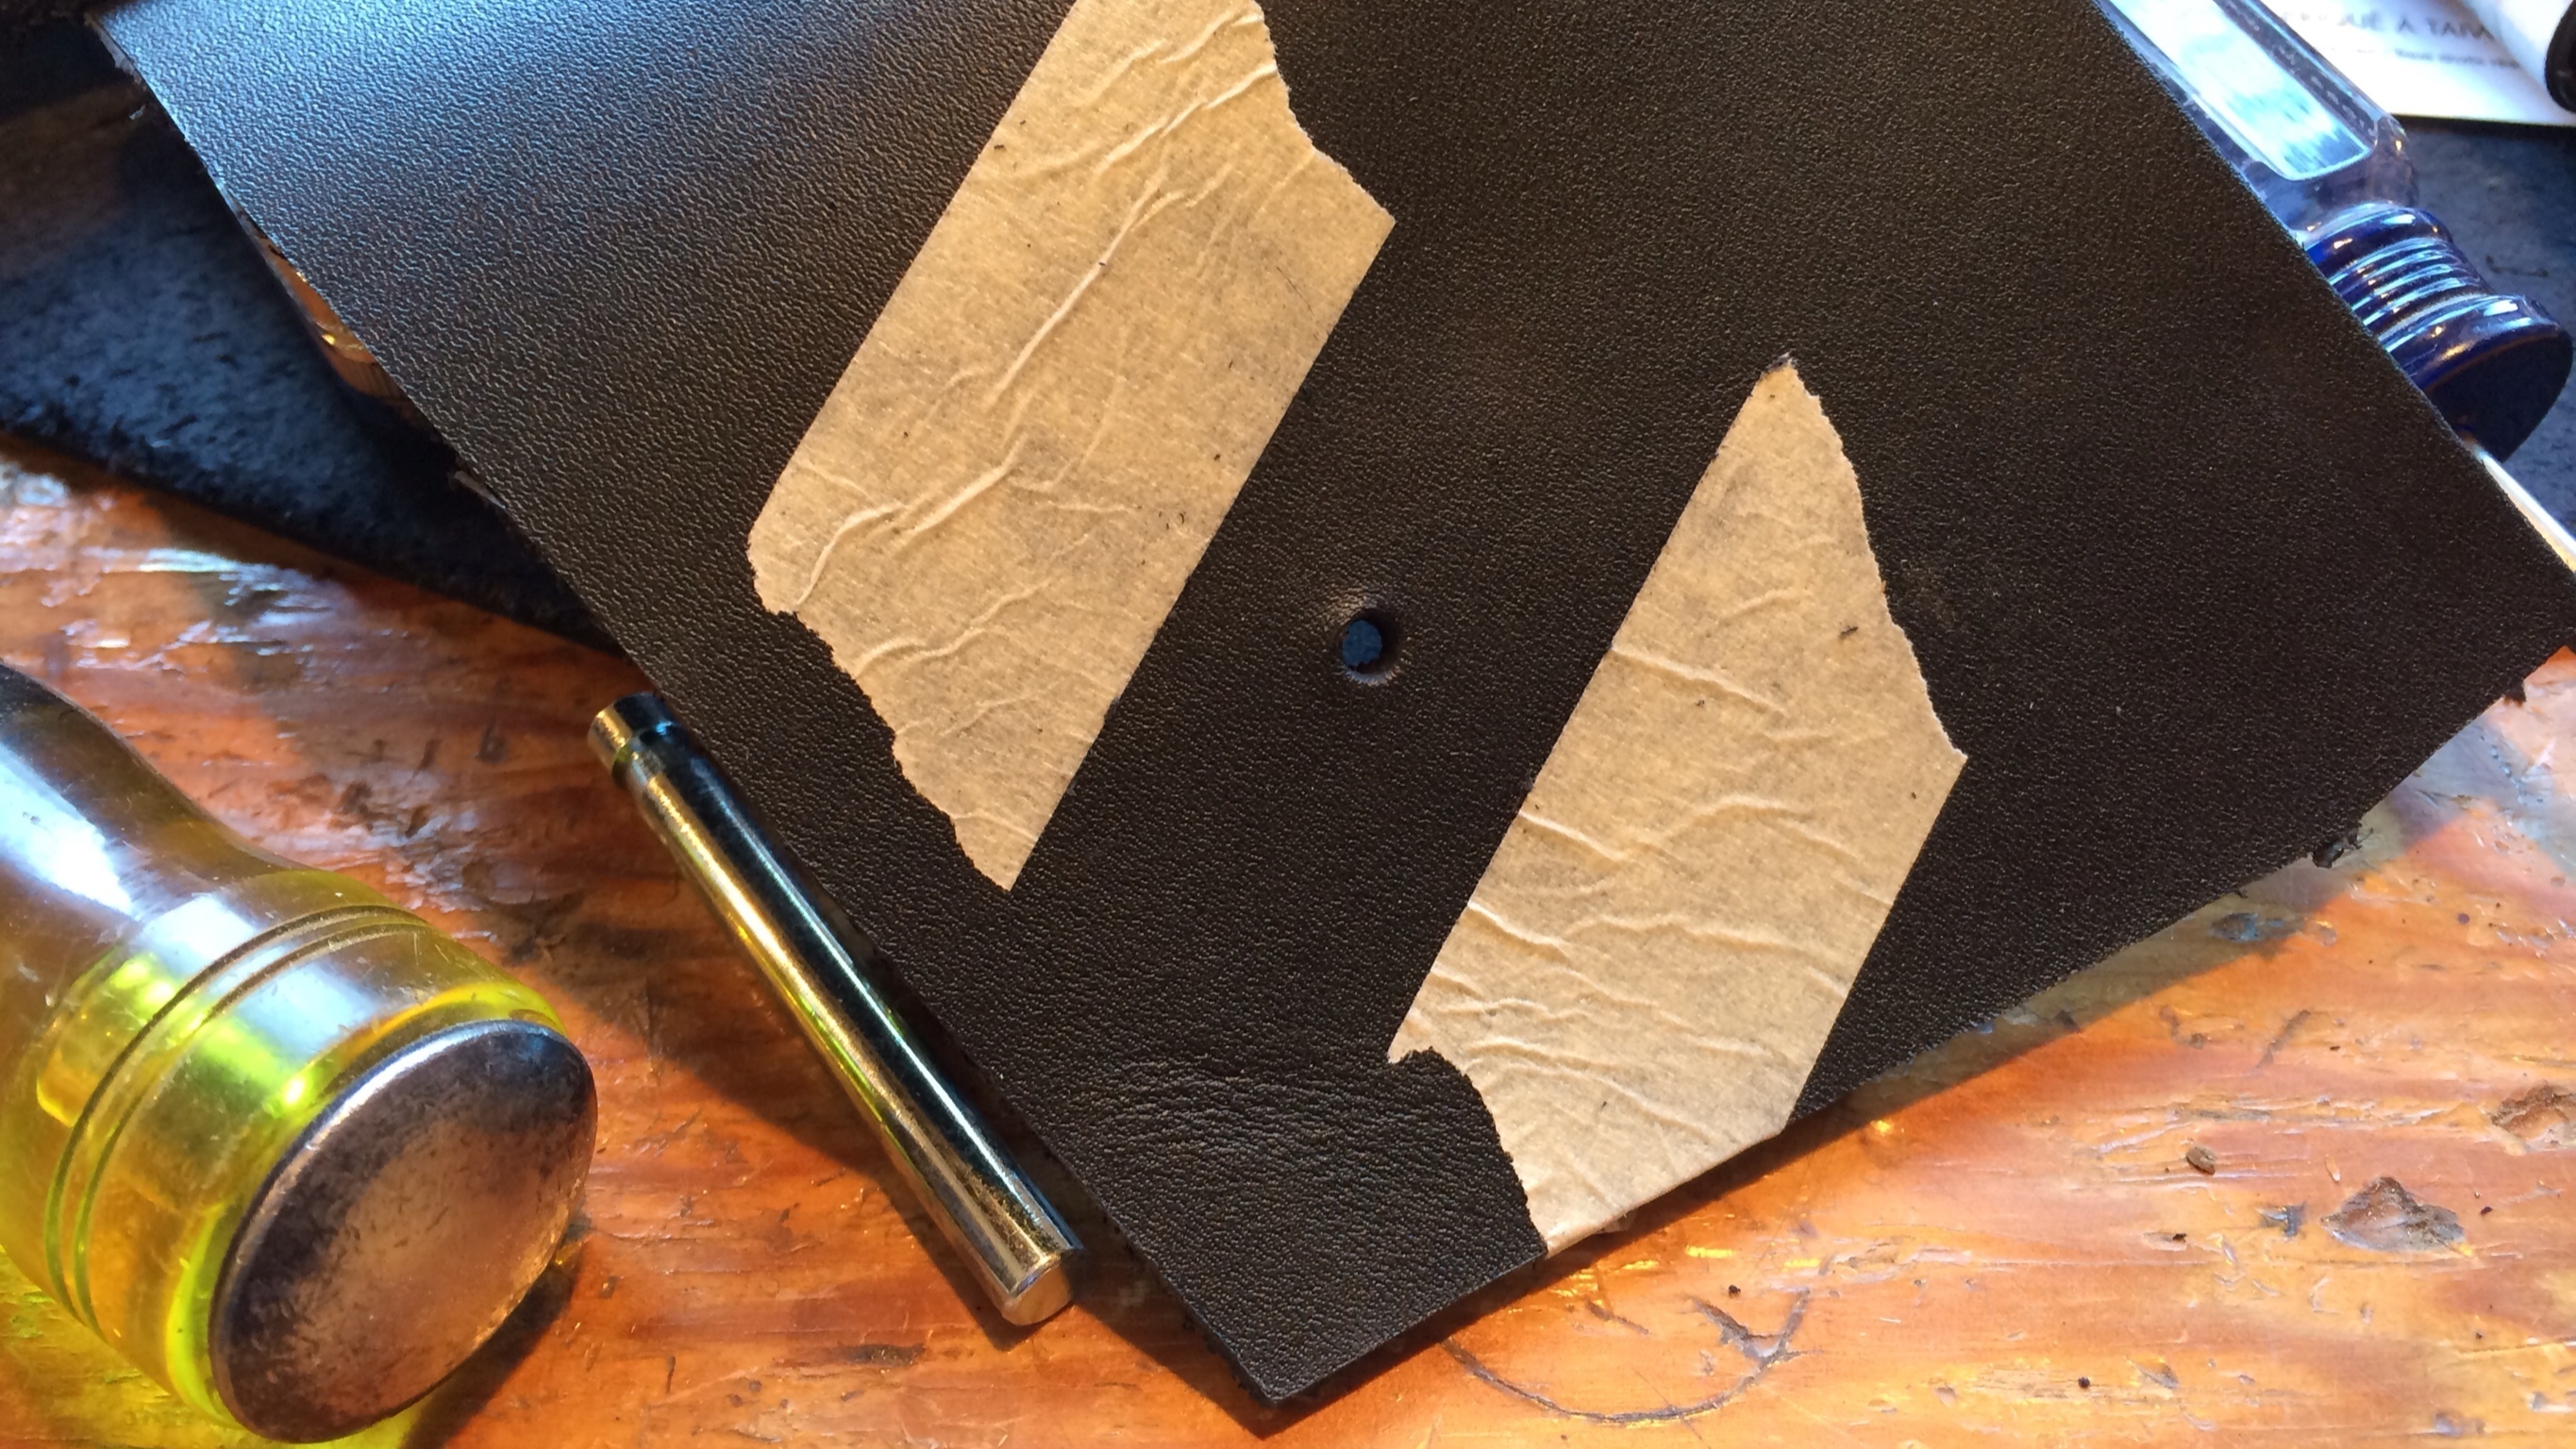
I removed a bit of leather from the inside of the sheath, so that the back of the snap would not protrude as much. I inserted the back of the snap…

… then placed the front on top. Using the anvil and setter that came with my snaps, I hammered the inside of the snap over until it was firmly secured.

Next I placed the sheath back on the axe, clamped it in place, and drilled holes for the front seam. It took some fiddling to get the spacer where I wanted it, so that it would be up against the edge of the blade. I started by drilling a hole at the top and bottom, and putting a temporary string through them so the clamps wouldn’t be in the way.
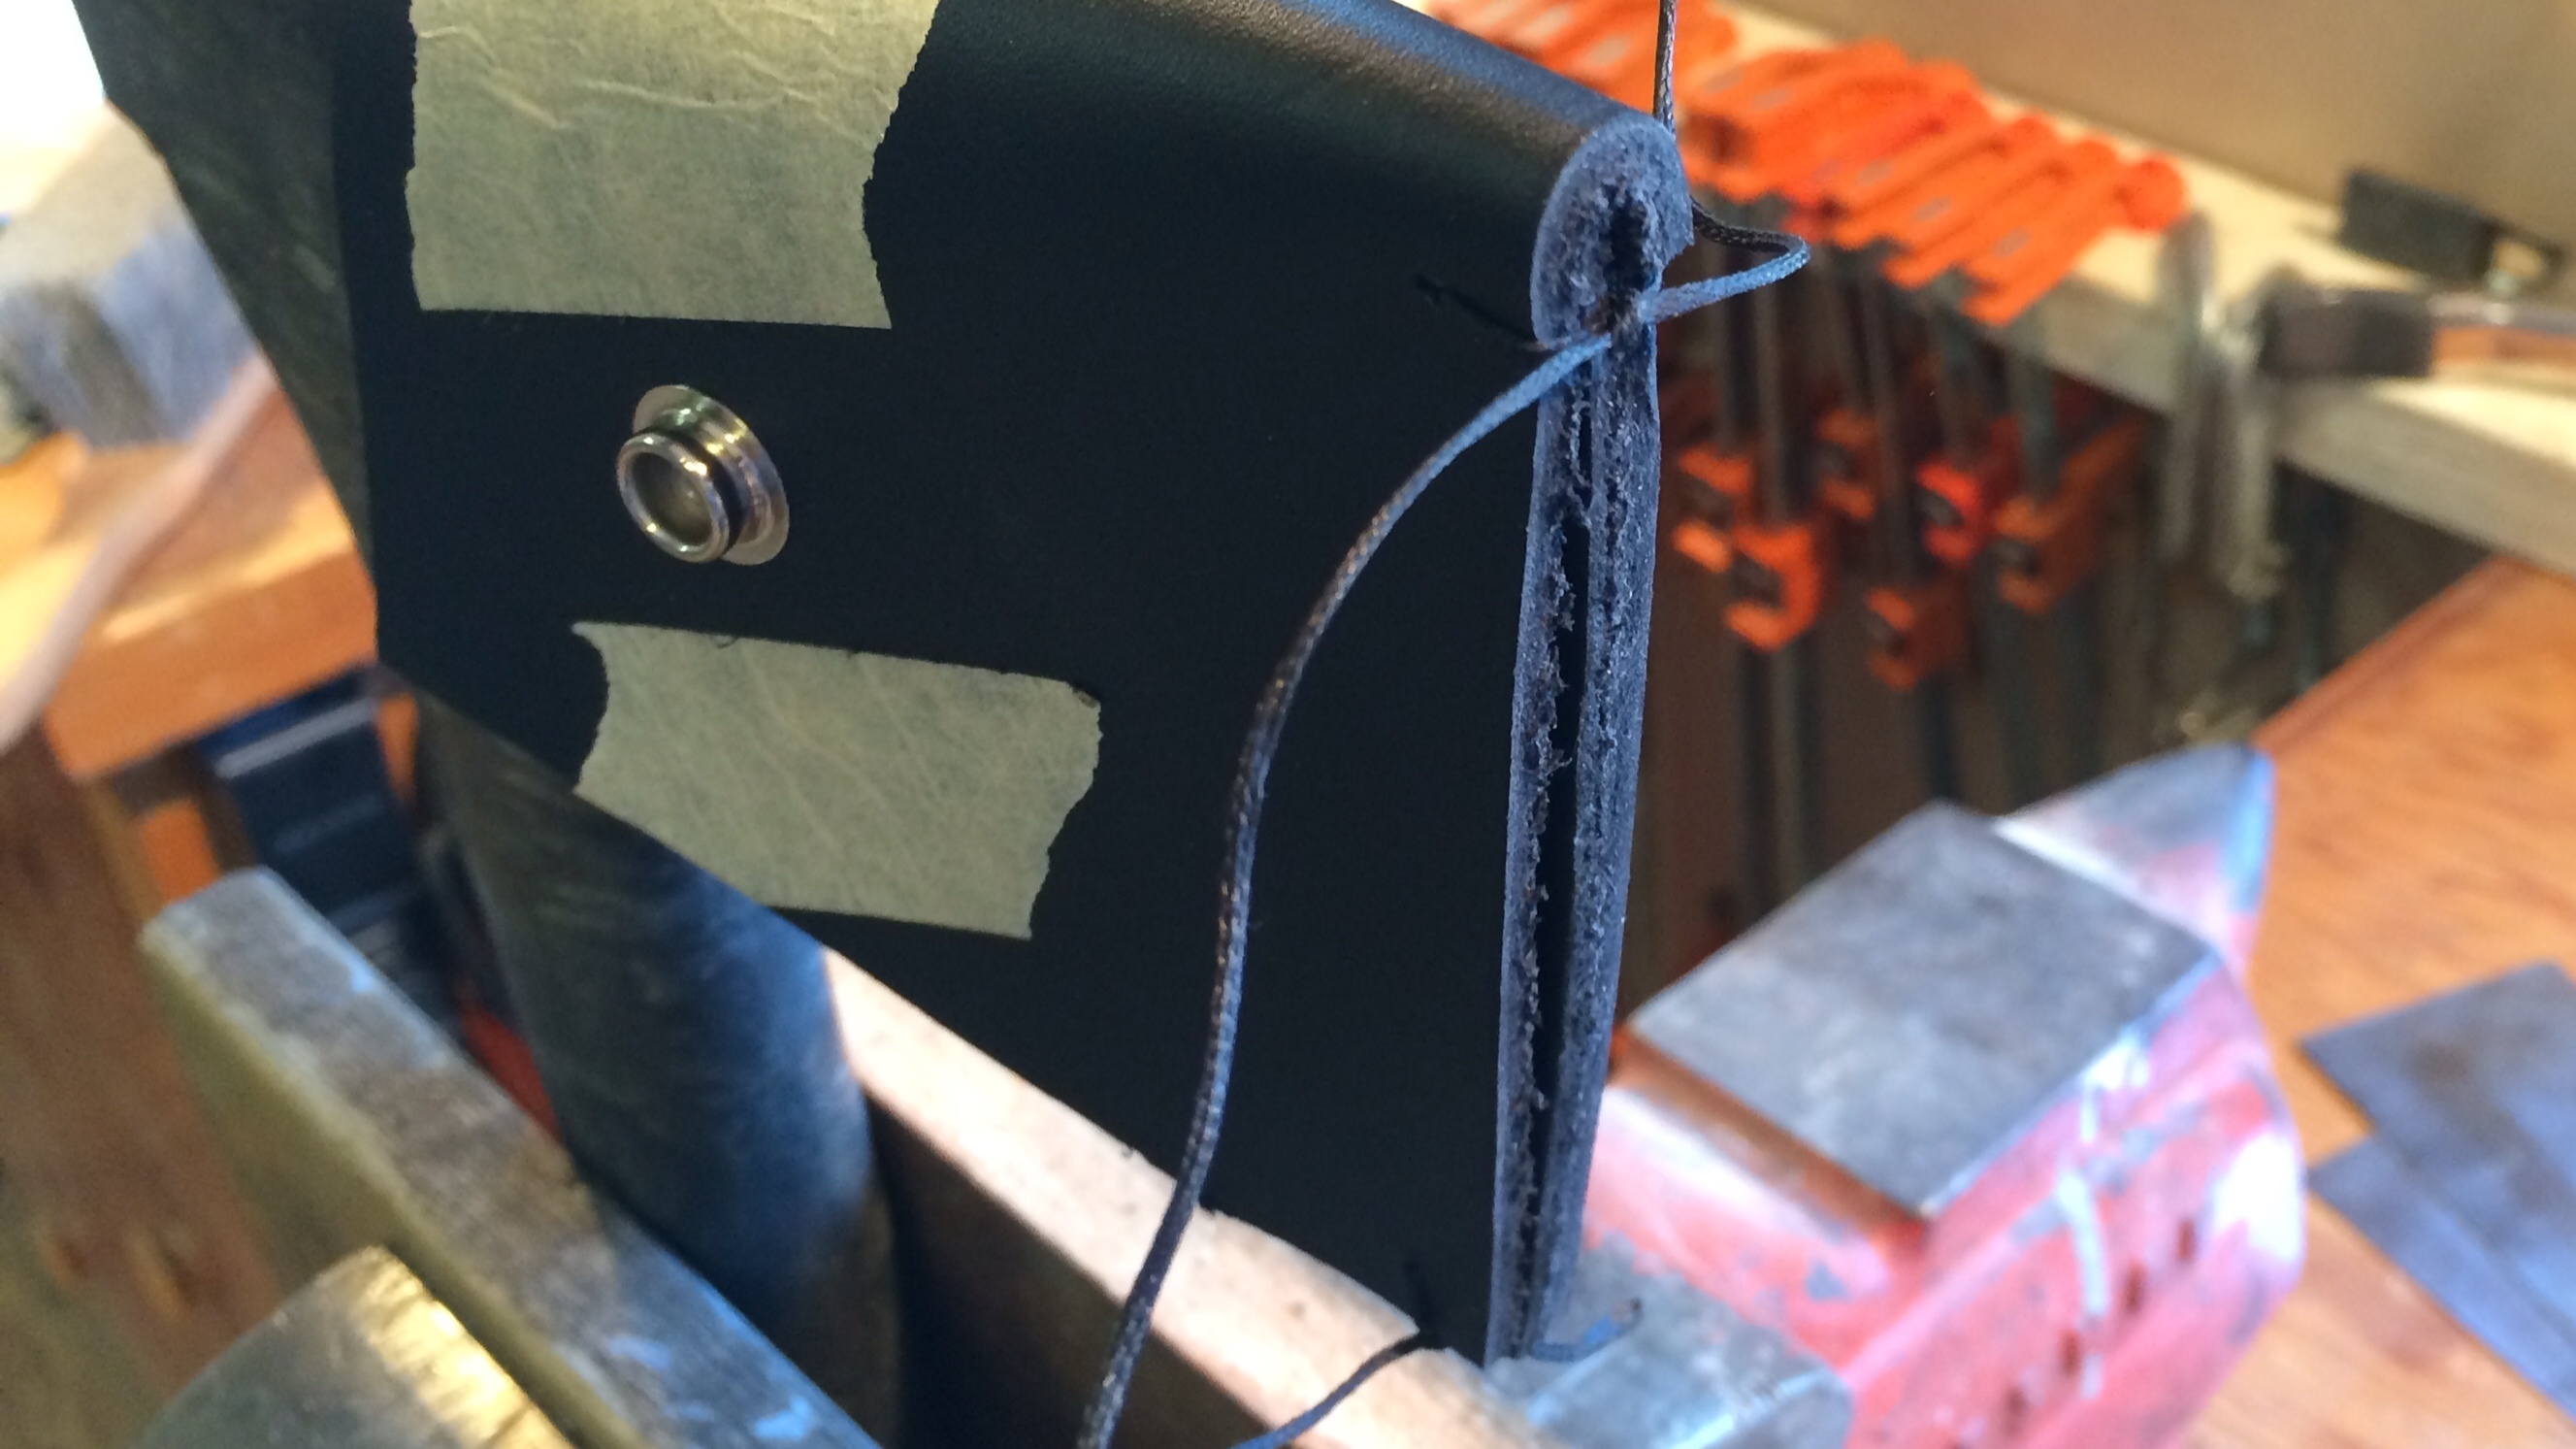
Then I stitched up the seam. I used a two needle stitch, where each goes through each hole from the opposite side. This was a bit easier than my previous method, but I still broke a couple needles. If I had made the holes a bit larger, I wouldn’t have needed touse pliers to pull the needles through, and probably wouldn’t have broken any. But, I wanted the holes to be small.

At the end of the seam, I tied the ends of the string together between the leather, and shoved them out of sight.

At this point, I placed the sheath on the axe, looped the strap around, and held it over the male end of the snap. I tapped on the strap to make a mark on the inside where the snap was. Then I removed the sheath from the axe.
On the inside of the strap, I measured about 1/8’’ from the center of the circle made by the snap, in the direction of the stitched end. Here I punched a hole and installed the female end of the snap. Going back 1/8’’ ensured that the strap would need to be pulled tight across the axe.
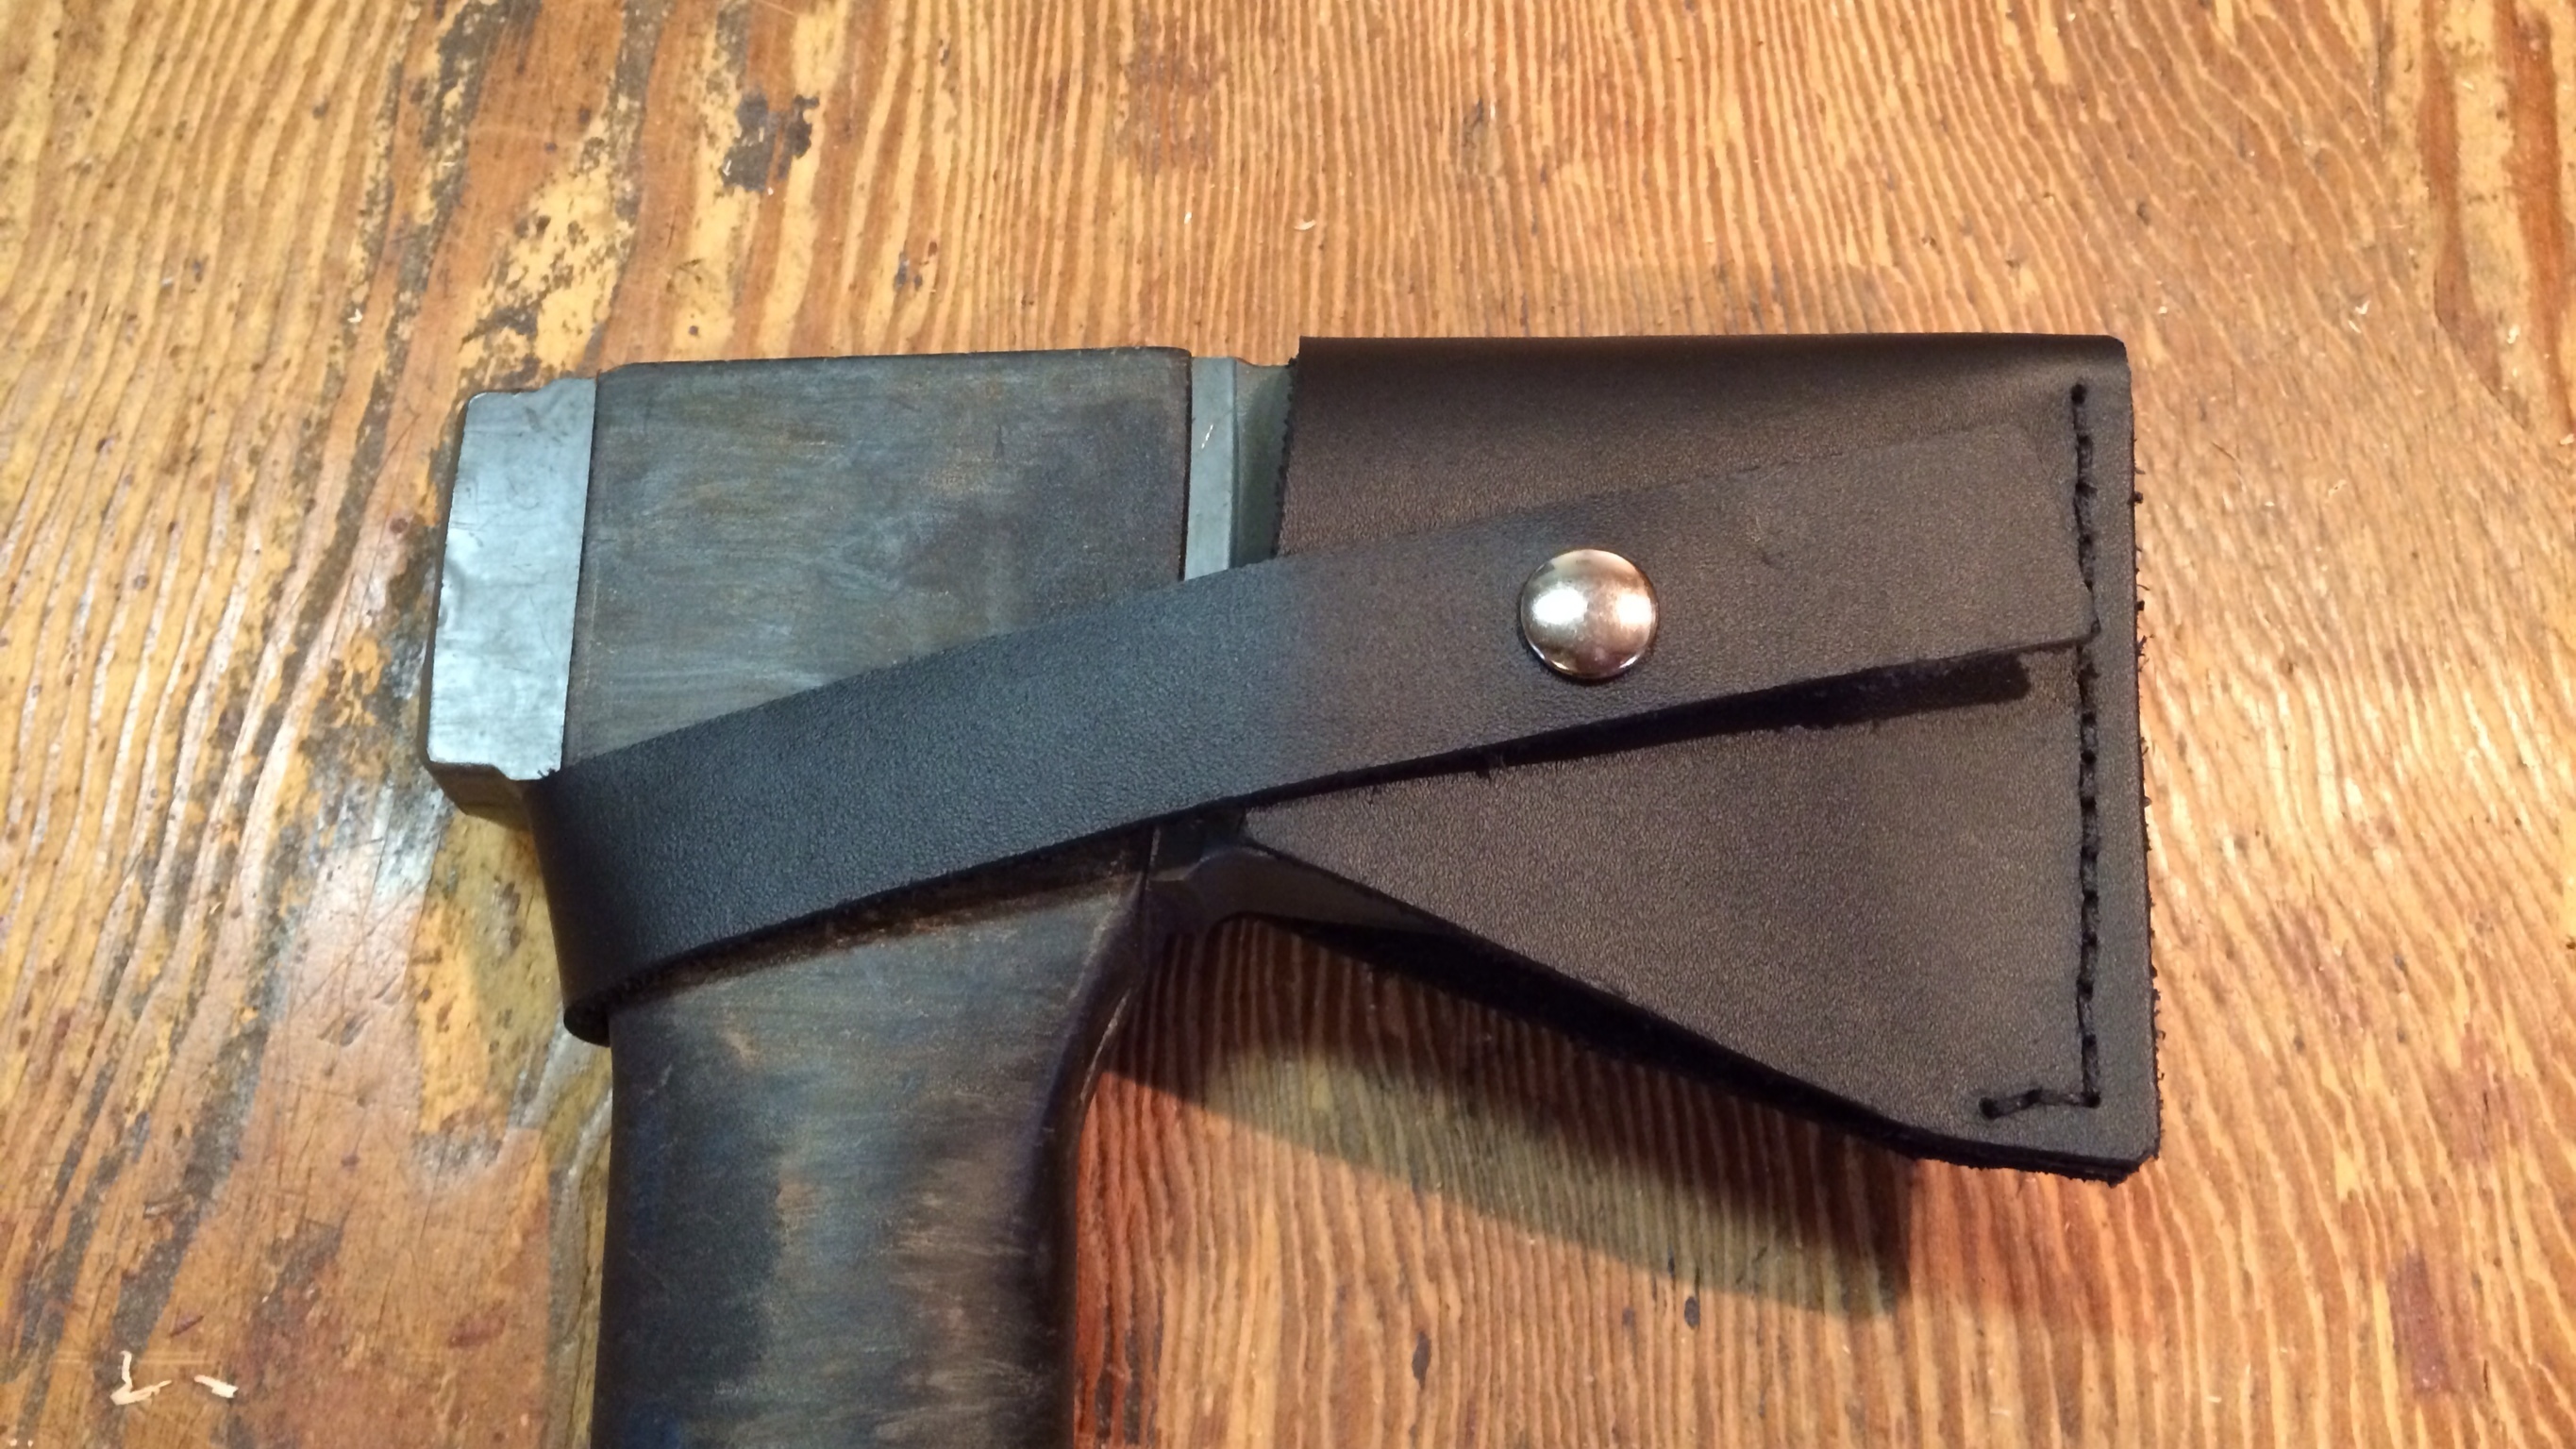
At this point I considered it done. My leather did not appear to need dyeing at the edges, so I left it alone.
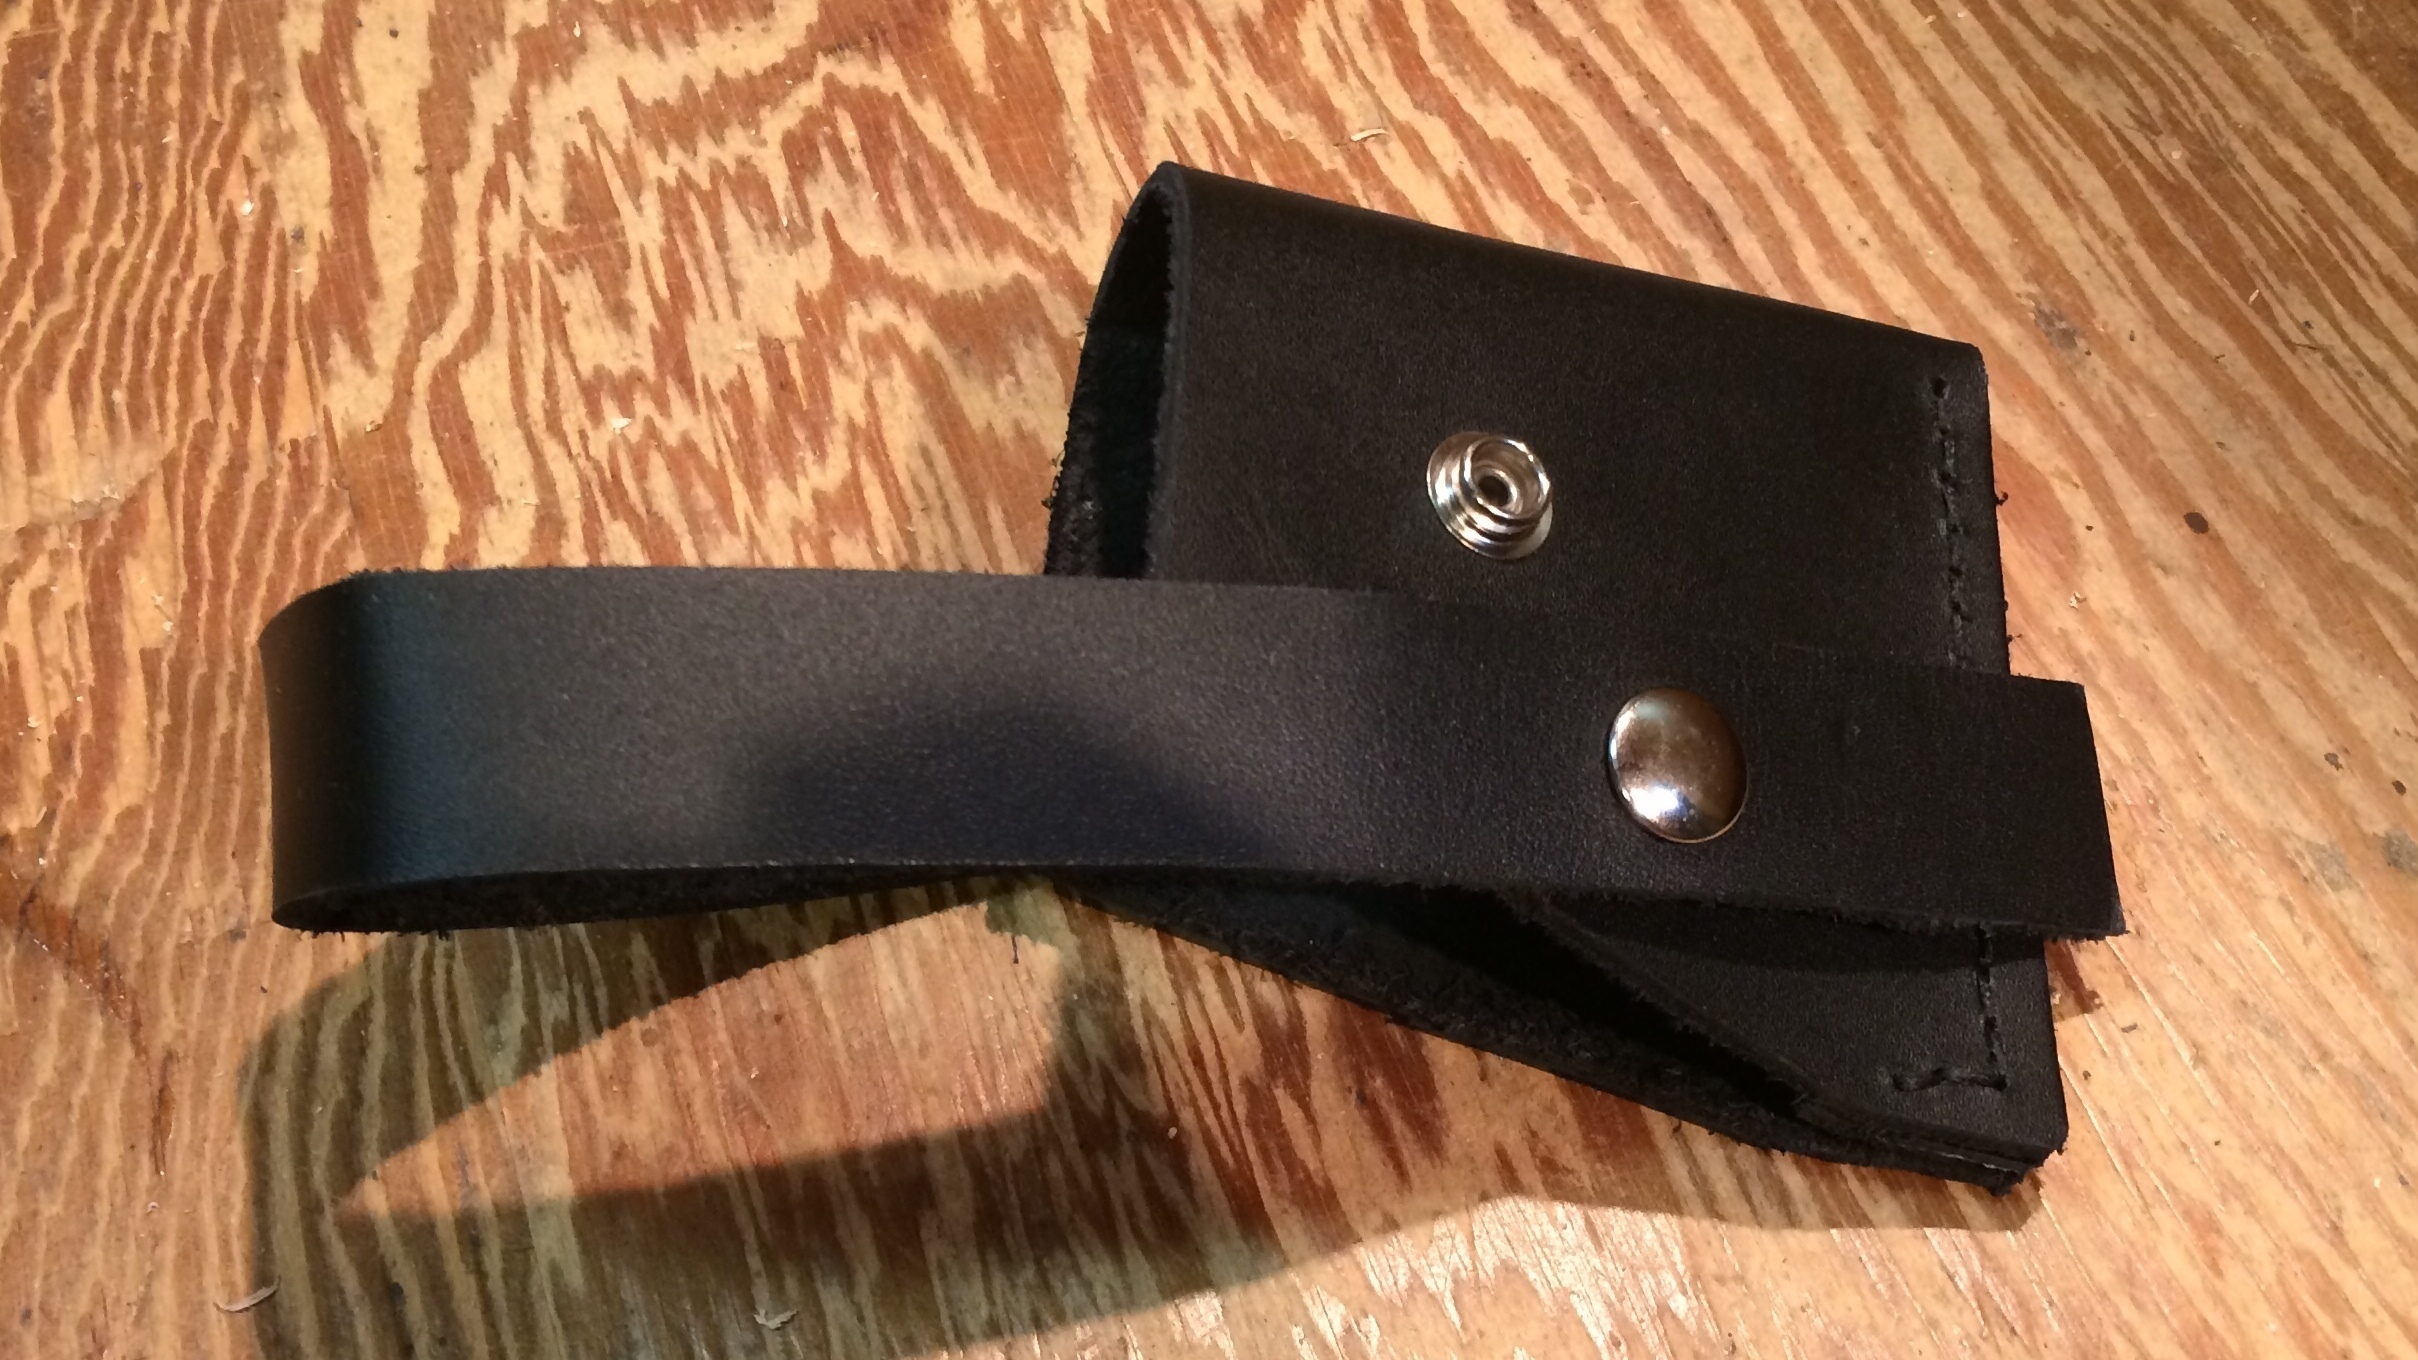
I like how it turned out. The smooth black leather and the shape of the sheath fit the style of the Fiskars axe well.
Plans
If you would like to make your own sheath, I have templates! This PDF can be printed on a piece of US Letter paper (8.5’’ by 11’’), and used as a template for each of the pieces.

The leather I used came from an 8 oz. Smooth Black Strap Leather Bundle from Leather Unlimited. I bought Easy-To-Do Line 24 Snaps & Setter and Waxed Braided Cord from Tandy Leather. The axe is a Fiskars X27 Super Splitting Axe.
Main Page